The Outlook application has two data files – Offline Storage Table (OST) and Personal Storage Table (PST). PST file contains all mails and is stored on the local system hard disk whereas the
OST file is the exact replica of Exchange Server data and saved as local copy on the user’s system which is maintained to save Exchange data for offline use. A user may however feel the need to convert the file from one format to another. Here are some of the reasons which justify such conversion of files from one format to another.
- Exchange Server crashed due to corruption or other reasons
- Exchange Server is under maintenance
- Accidental loss of Exchange data
- Moving OST file from one system or OS environment to another
- Need for a permanent and portable backup of OST data
- Company or organization compliances and regulations
In any circumstances, if a user wants to convert OST to PST or extract data from a backup OST file, then they can easily refer to the content of this blog.

Expert Solutions
Get instant solution to convert Exchange OST file to Outlook PST, Office 365, Live Exchange mailboxes and RTF, EML, MSG, HTML, PDF formats via OST to PST Converter tool.
To convert an OST to a PST file, there are plenty of ways. These solutions are free and can be performed by any user but some amount of technical expertise is always needed.
Converting Exchange OST File to Outlook PST File Free
There are few popular free solutions where you can convert OST to PST or move OST data to the PST file.
- Using Export Feature in Outlook
- Archiving OST data to PST file
- Run the Manual Archiving
- Drag-&-Drop into a New PST File
Note: If the data you want to move from OST file to access is quite less, then you can directly forward them as emails to any specific email address.
A. Using Export feature in Outlook
All Outlook versions come with an integrated and in-built Import and Export feature which allows users to move OST files data to PST file easily. The main condition here is that the OST file needs to be connected with Exchange Server at the time of export. It is useful for the local and portable backup of Exchange mailbox data. Let us understand the process.
- Run the Outlook application. Go to File > Import/Export.
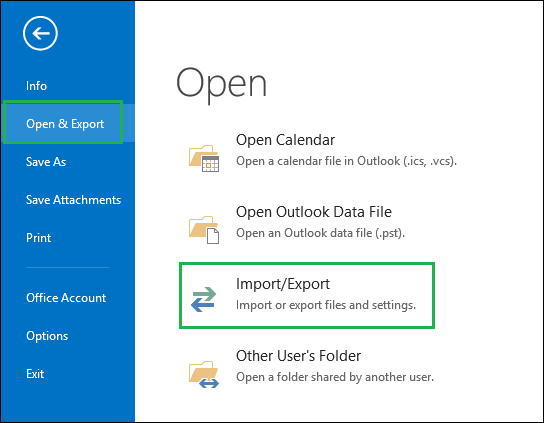
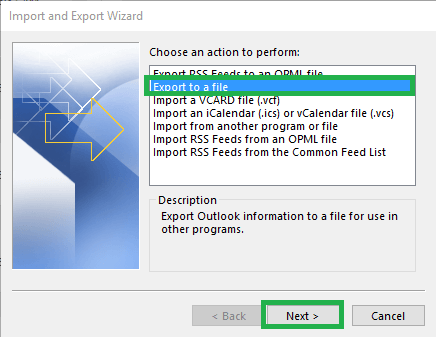
- Select the option stating Export to a file and click on Next.
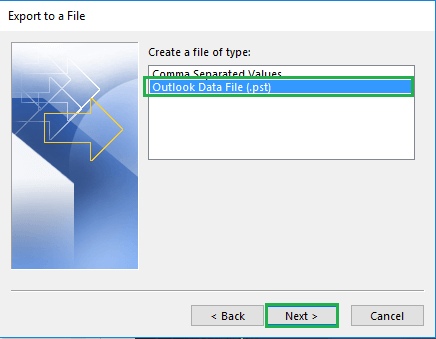
- Next, you can select the type and format of the file to which you are exporting the OST data. Select Outlook Data File (.pst) option. Click Next.
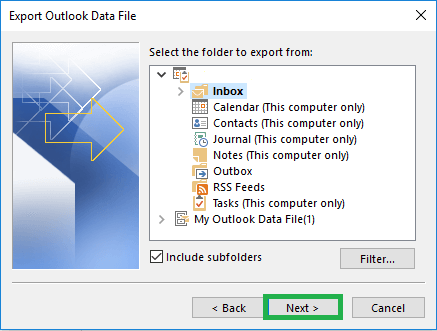
- You can move a single mailbox folder (mostly used Inbox folder) to PST. Select the folder of your choice and also select the checkbox Include sub folders. Then click on Next to continue.
- Click Browse and enter the address for the PST file location on your system. Choose any option for managing duplicate items and click on Finish.
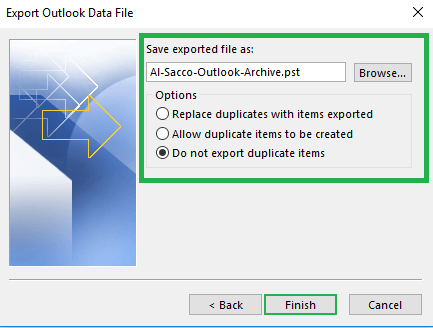
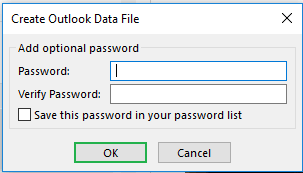
- Next, you can add the password to your saved PST file or continue without it. The process of conversion will start and complete as per the data involved.
B. Archiving OST emails to PST format
Emails cover the maximum space of the mailbox. There are different sections which store the data in an email such as an inbox, outbox, sent items, and other user-defined folders. All of the folders are designed to secure the emails and keep them sorted. Additionally, the attachments, images and other animations present in the body of the email can increase the size of a single email also. The size of an OST file is limited, so Outlook offers a simple method to move the older emails that are no longer useful for the user.
- Click File in Outlook and go to Options category.
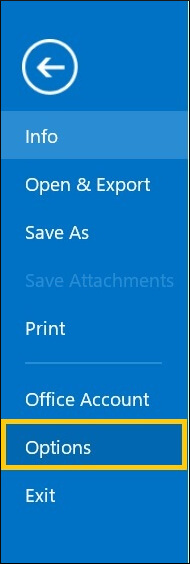
- Go to Advanced category and click AutoArchive settings.
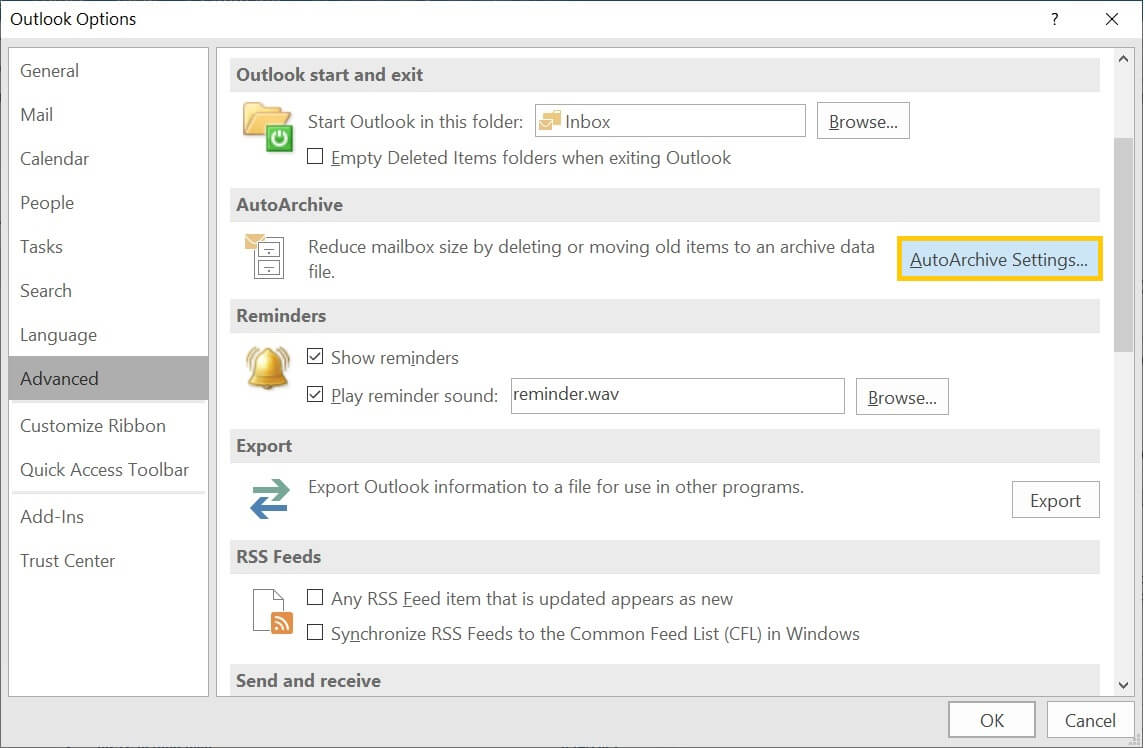
- By default, the wizard remains inactive. So, you should click the checkbox to run AutoArchive after every selected day. Choose the number of days. AutoArchive can delete expired items (emails only), archive or delete old items, clean out items older than selected months. You can either move old items to a chosen folder or delete them permanently. Use all the settings and click OK.
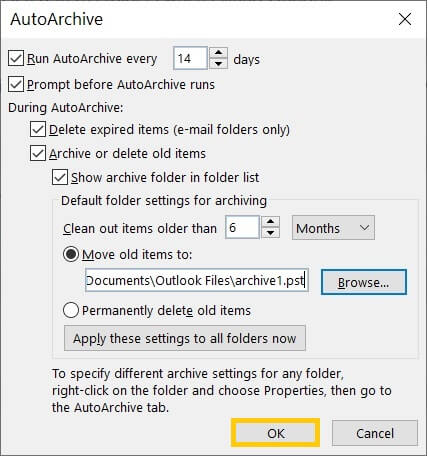
The archived file will be a PST file. But, you should understand that the archive file will be saved only to emails. If you want to save contacts and other contents, then you should use other methods.
C. Run the Manual Archiving
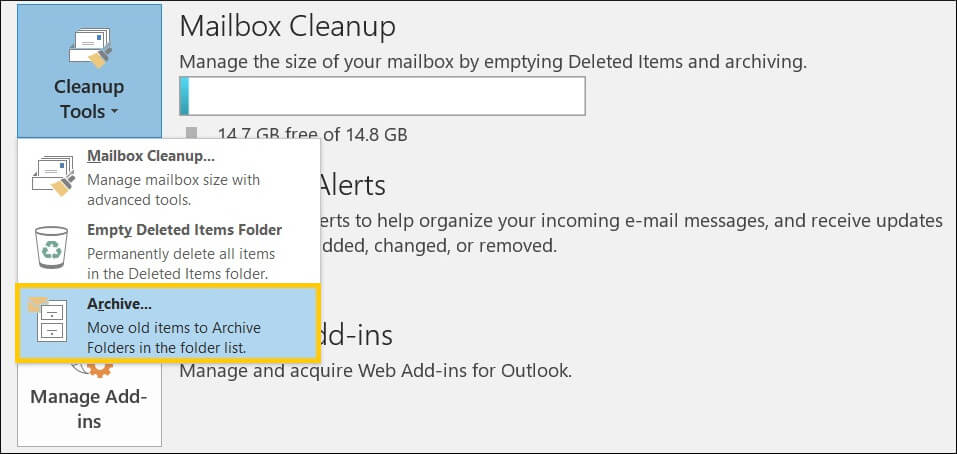
If you do not require consistent backup using AutoArchiving, then you can run the manual archive also. It will perform the same job but with more control. You can go to Info section after clicking File option. Then, choose Cleanup Tools >> Archive.
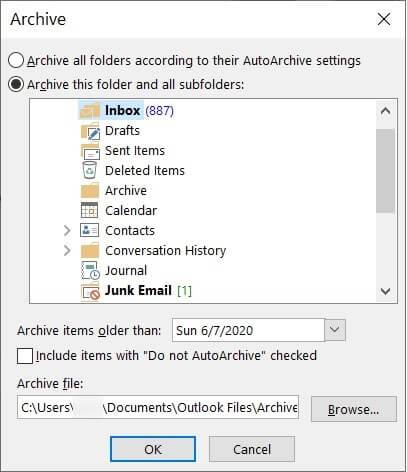
Select the second option to archive this folder and all subfolders. Select the folders and choose a date to archive items older than that. Use the Browse button to save the archived file in PST format. At last, click OK.
D. Drag-&-Drop into a New PST File
Rather than exporting the whole account, you can create a new PST file in Outlook and drag-&-drop contents from older account.
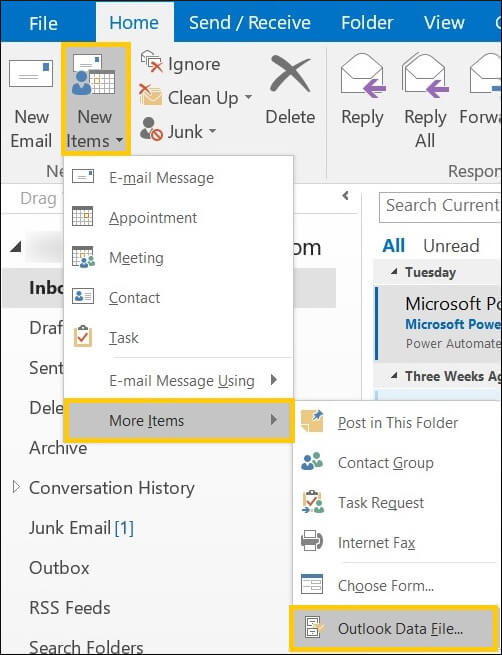
- In Outlook, Click New Items and expand it with More Items. Choose, Outlook Data File.
- Later, you can use the simple drag-&-drop function to move the account objects.
Drag and drop action for OST emails to the newly created PST file is also an option if there are few emails only. This solution works well if the data for conversion is not much and the Exchange conversion is not interrupted.
In addition, one can also convert the OST file to PST without Outlook. It is important to understand that during the process of converting the data from one form to another, there may be a chance of losing the data. Each syntax cannot be a lookalike of the other. Therefore, there is a need for a professional tool that can easily convert OST to PST without compromising the contents of the file.
In addition, the above mentioned methods also do not support conversion of corrupt Exchange OST files. They are usually slow and dilatory in nature.
Users seeking large OST file to PST can try an efficient professional third-party OST to PST converter tool which guarantees safe and efficient conversion without any connection and file-size restrictions. It is possible to convert the data from one form to another without losing any element of it. These tools help to develop original files in the minimum amount of time.
| Comparison between free and automatic solution | |
|---|---|
| Free Solution | OST to PST Converter Tool |
| Archiving can lower the size of data file. | The software converts the OST file content in their actual size. |
| The manual process can export a single account at a time. | The software converts an OST file entirely. |
| Drag-&-Drop can cause data deletion. | The software does not lose even a single bit of data. |
| The manual processes are suitable for smaller accounts. | The software supports large data files for conversion. |
| The manual methods do not repair corrupt OST files. | The software can repair the severely corrupt OST files. |
| All manual methods require Outlook to run the processes. | The software does not require Outlook to convert OST file. |
Conclusion
All the methods with the help of which you can easily convert the files from one format to another have already been discussed above. A user can decide any method depending on his own convenience and interest. All of this is very easy to execute and does not require any expert assistance. User can also use automatic OST to PST converter tool to convert OST to PST file.
All methods suggested in this blog are different and easy to use. This is the best blog, which provides different methods according to the user’s requirements. I used these suggested methods to convert my OST to PST, and the result was successful, as I expected. Thank you for sharing this amazing blog.
All mentioned free methods are effective, easy to use and risk free, but user must have some basic knowledge of Outlook application. I did the same with Outlook manual archive feature by following the given process in this post. You would not believe that I converted all OST file to PST file absolutely free or without spending money. Thank your for sharing this free method.
An amazing blog with four different methods for converting OST to PST. The blog also provided useful information on the causes of file corruption. Users can select any option based on their needs. These methods help me a lot to convert the files without spending money. I appreciate all these methods for those who are looking for a free solution.
Using the Impost/Export method to export Outlook data file to PST file is very quick and easy method to common users who are not aware of technical things. It is simple and directly exports data to PST file format to a user defined location.
I was searching for a free method for OST to PST conversion, and I found this blog having four different methods in the simplest and easiest way. The variety of methods allows users to select the methods that best suit their needs. I tried the second method, and it worked well. Thanks for sharing this informative article.
Amazing blog that offers a variety of free manual methods. Users can select any method based on their requirements. My friend and I used these methods to see which one produced the best results. We discovered that all methods could provide a satisfactory result for the user. Thank you for sharing this informative post.
My search for free solutions to convert OST file ends here with this post. These are the best free methods described in pictorial form to help the users. I appreciate these methods to all users who are looking for a free solution.
Finally, I got these free manual solution to convert my OST files to PST format. I followed the instruction in a given blog step by step and after a few minutes my OST files converted into PST files. This blog is very helpful for them who are looking for free solutions to work with all Outlook Versions. Thanks to the author for sharing this amazing blog.