The data file in the Outlook application is the repository of all your emails, contacts, sent items, notes, calendar, outbox, sent items etc. The hierarchy of the mailbox is saved as it is in the Outlook data file. But, the user does not need to create the data file manually as Outlook does it for you automatically as soon as you create a new Outlook profile.
But sometimes, the user many require to add new PST file for backup and archiving purpose. When an employee is leaving the organization, then the manager will want to access employee’s emails and then the manager will add the employee’s Outlook account’s PST to his/her account. Similarly, there can be other circumstances when the user will need to close and remove the data files. MS Outlook allows all such actions within the application and the steps are easy to follow.
Add Outlook data file (.pst) file in Outlook
-
- Start the MS Outlook application of modern versions like 2019, 2016, and 2013.
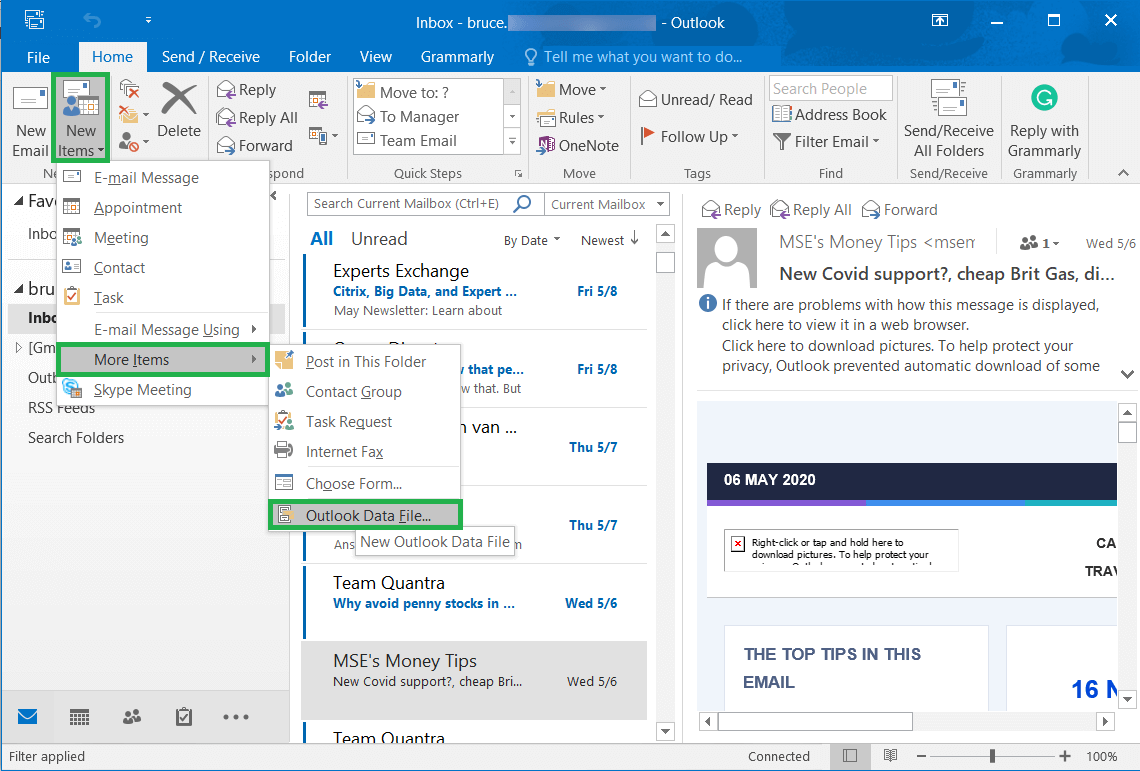
- Click New Items, then choose More items, and finally go for Outlook Data File.
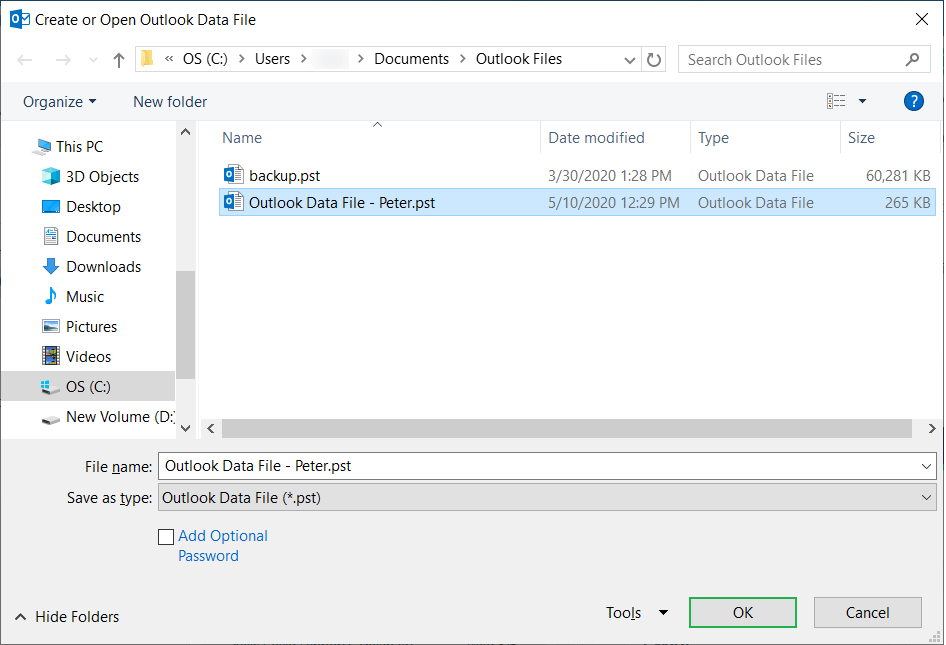
- Browse and select the PST file of different account and click OK.
- A new mailbox will present itself with all the associated folders.
Another method to Outlook Data Files (.pst) through the Account Settings Windows.
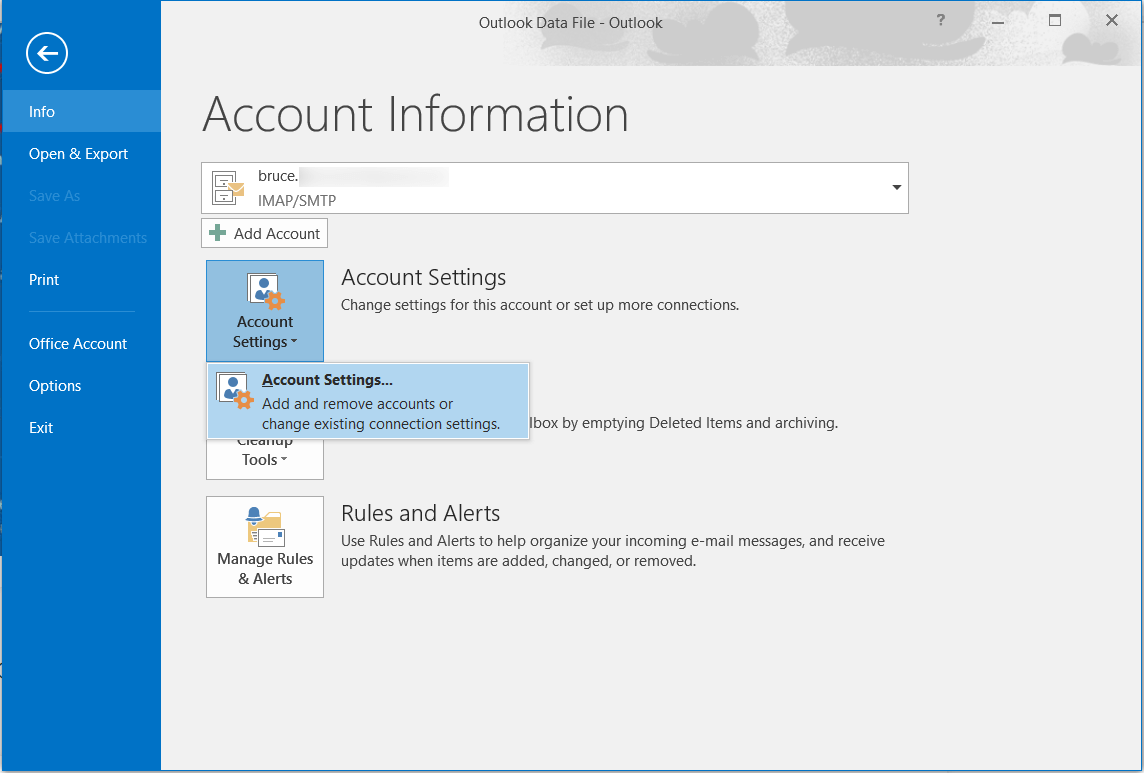
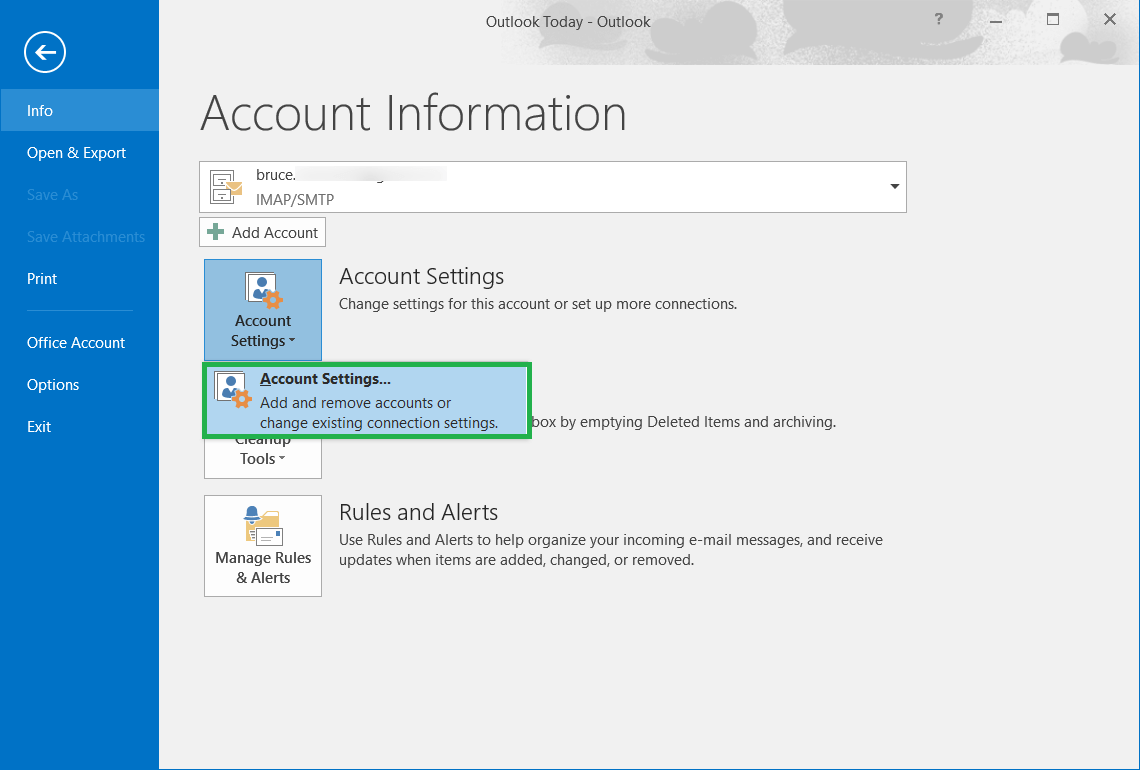
- Click File, then click Account Settings, and again Account Settings.
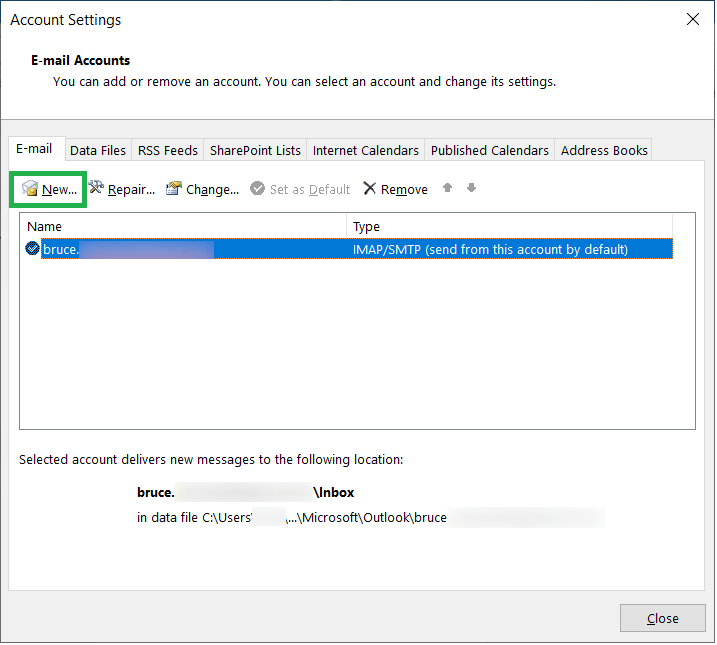
- In the Account Settings Window, click New and follow the steps to add the PST file.
Close Outlook Data Files (.pst) in Outlook
When you have accessed the emails from the added PST file and you no longer require the presence of such PST file, then you can close it so that the Outlook profile does not look messed up.
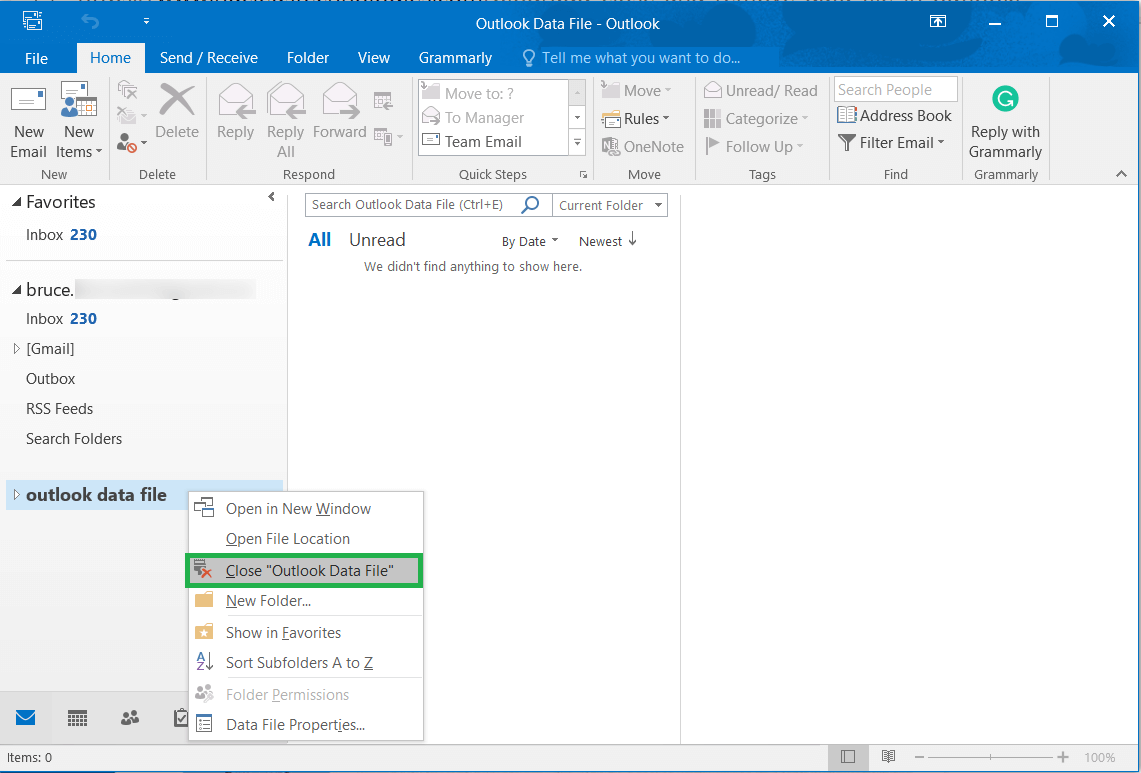
- Choose the profile, right-click and click Close ‘Outlook Data File’. It will instantly close the profile.
Remove Outlook Data Files (.pst) in Outlook
An active Outlook account requires the PST file and if you want to remove PST file, then it means you will need to remove the account itself.
- Go to Account settings, Account Settings.
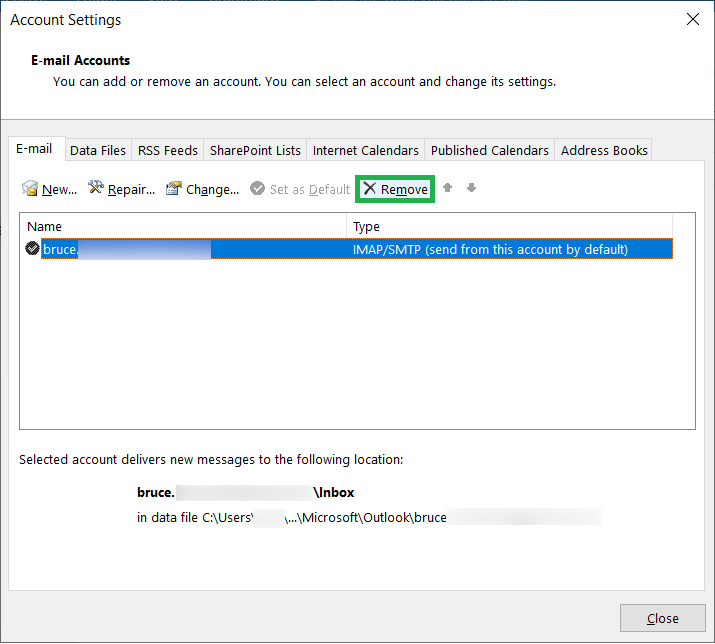
- In the Account Settings Window, choose the account and click the Remove button. It will ask you to confirm your selection. Click Yes.
Outlook PST file
Outlook PST file contains all the Outlook items like email, contacts etc. and the account can be an IMAP/POP account, Exchange Account, Microsoft 365 account, etc. Apart from Add, Close and Remove Outlook Data File, you can apply other actions on the PST file also like taking an archive or exporting to a separate PST file. Both actions are necessary to keep the Outlook healthy and the user should know these steps also.
Archive Outlook data file
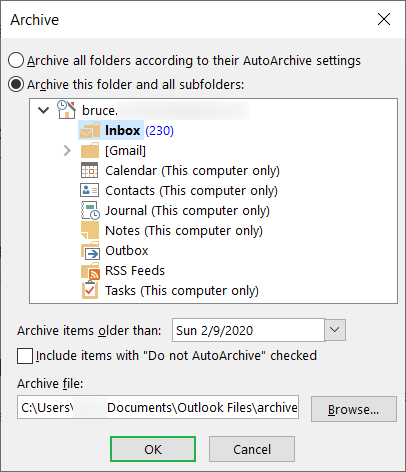
Taking the archive of PST file will save the selected items in the separate archive folder and it increases the security factor of the user’s Outlook account.
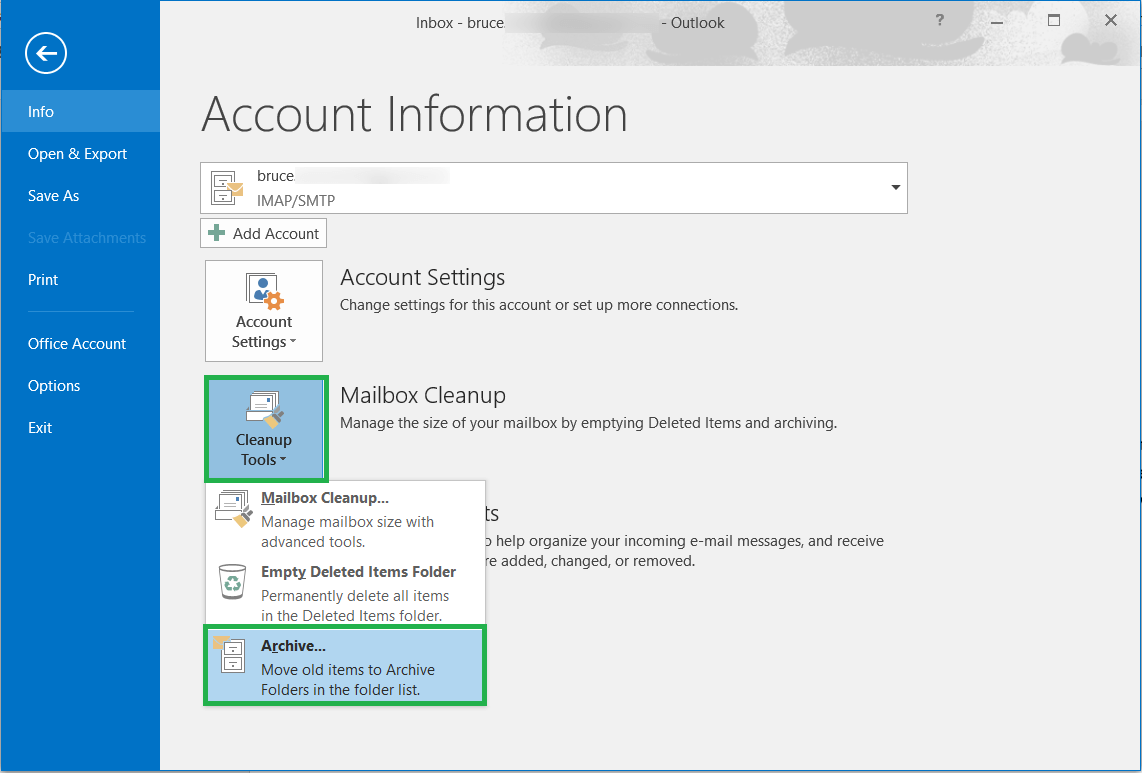
- In the Account Information, click Cleanup Tool category and here you need to click Archive option.
- Choose among the various options to take the archive and browse a folder location for the archive folder. Click OK.
Export data to a PST file
When you export the Outlook data, then you create a separate PST file for the data and save or use the PST file in different manners.
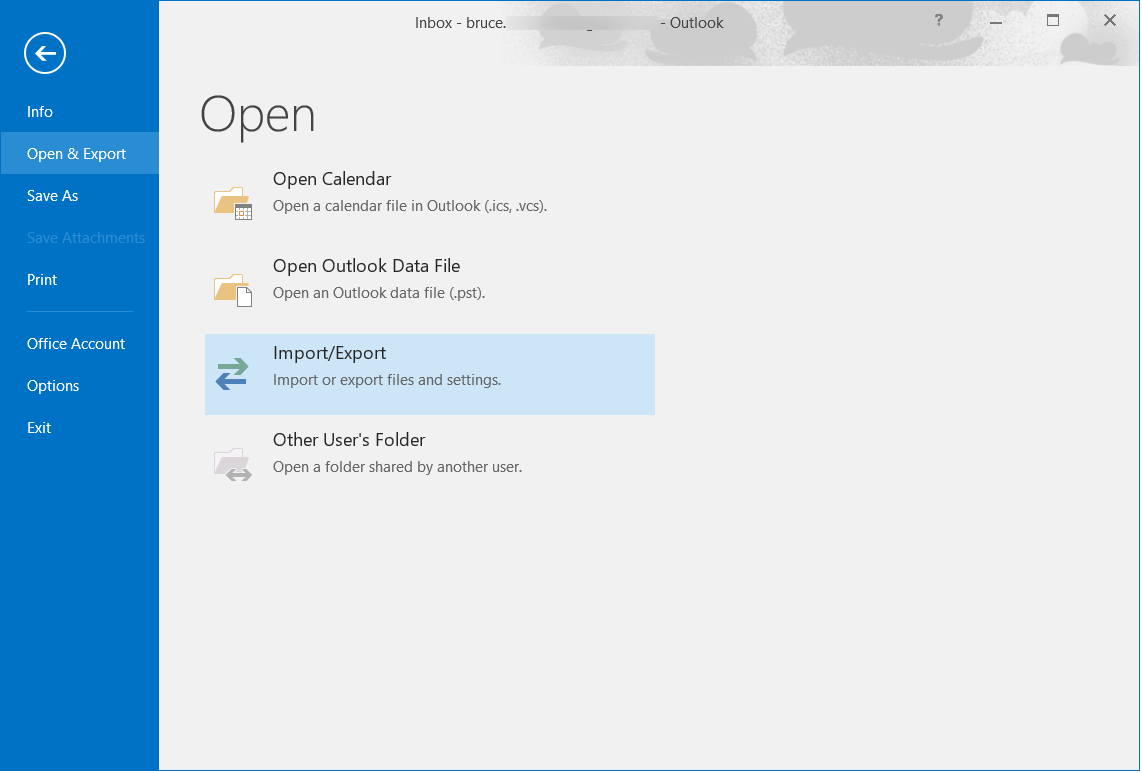
- In the Open & Export Category, go to Import/Export option.
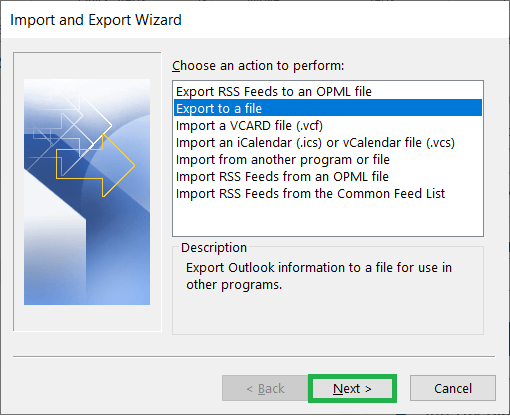
- Choose the second option Export to a file. Click Next.
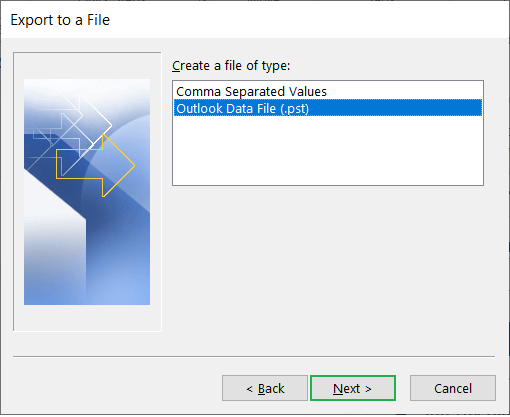
- Choose the second option Outlook Data File (.pst). Click Next.
- Select among the different folders check the option of Include Subfolder. Click the Filter button to apply the filters also. Then click Next.
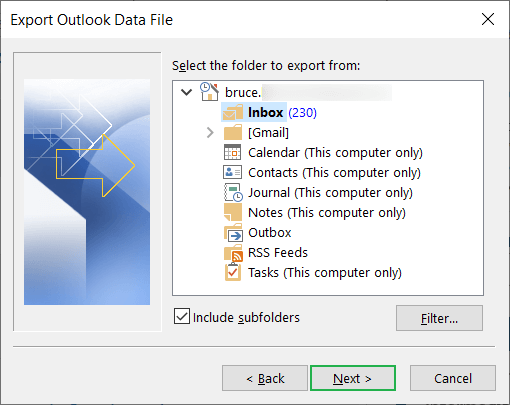
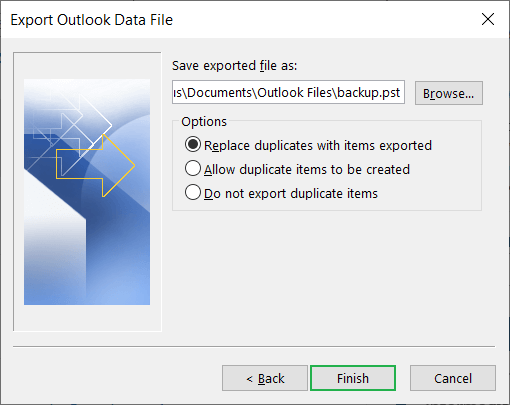
- There are three options to manage the duplicate items. Also you can choose to save the PST file at any folder. Click Finish.
Wrapping Up
The PST file in the Outlook is the core of all the activities. You can perform multiple types of actions on it like Add, Close and Remove Outlook Data File, but you cannot afford to lost its data. If PST file faces any corruption or deletion, then you should use the Inbox Repair tool instantly to recover the data. For more security, you can use a professional PST Repair software that can recover the data from the corrupt Outlook data files.

