Zimbra is another email client much similar to the MS Outlook application. Zimbra can also provide online as well as offline email experiences just like Outlook and it is also free of cost for the users to enjoy. The offline experience with Zimbra is very good and it provides one of the best browser-based interfaces that allow the end-user to have a powerful experience in their personal clouds. Although it cannot be compared to Outlook in terms of features and services since Outlook will outperform it anytime but Zimbra also has many features similar to it such as cross-platform functionality across Windows, Mac, and Linux while using IMAP/POP, CalDAV, CarDav. Additionally, Zimbra mailbox files (EML files) can be opened into the Outlook desktop client via simple drag and drop import.
In this blog, we will see ways for exporting Zimbra to PST file format so that it can be locally saved on your hard drive.
How to export Zimbra to Outlook PST file format?
There are two ways to achieve this task namely the manual method and using third-party best MBOX to PST tools. The manual method can be divided into three major steps.
- Export the files to the Zimbra mailbox and save them in EML format.
- Migration of EML files to Outlook.
- Export Zimbra to PST file format.
There are sub-steps for each of the following major steps in the manual method. Let’s look at them in detail.
Export the files from the Zimbra mailbox and save them in EML format
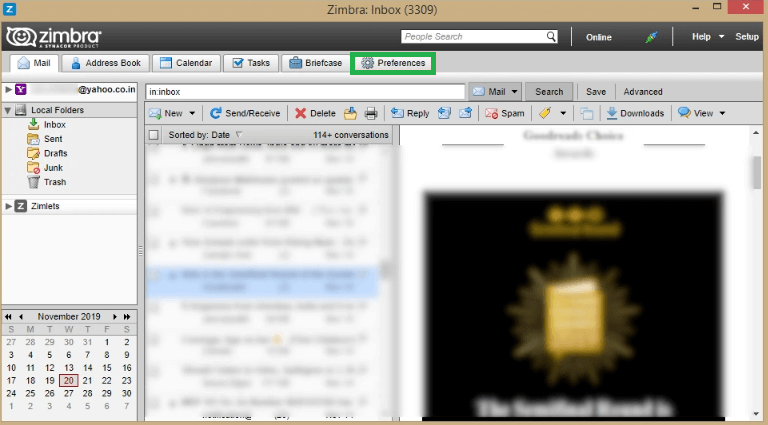
- Launch the Zimbra application on your system and click on the Preferences tab.
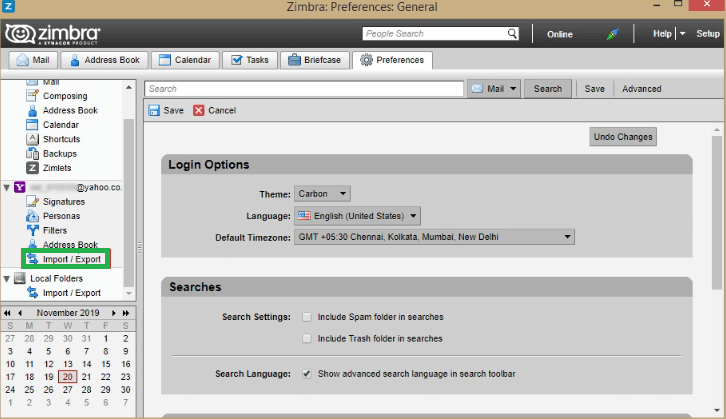
- In the left pane navigate the Import/Export tab and click on it.
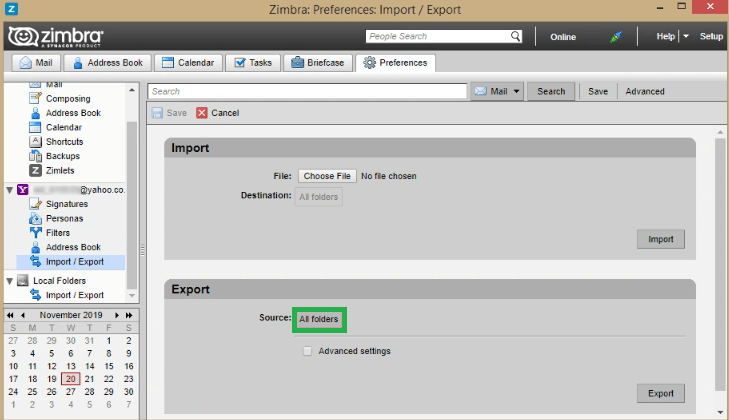
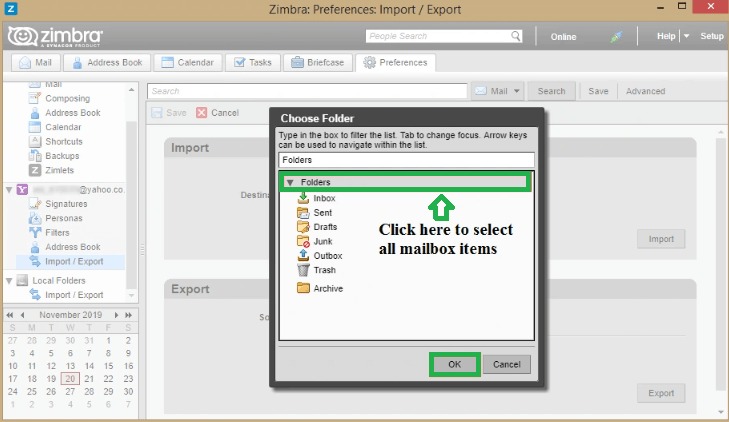
- In the Import/Export window, choose All Folders from the Export option.
- You will now be able to choose the individual mailbox item or the whole mailbox to export. After selecting the files click OK.
- Click on Export to start the process.
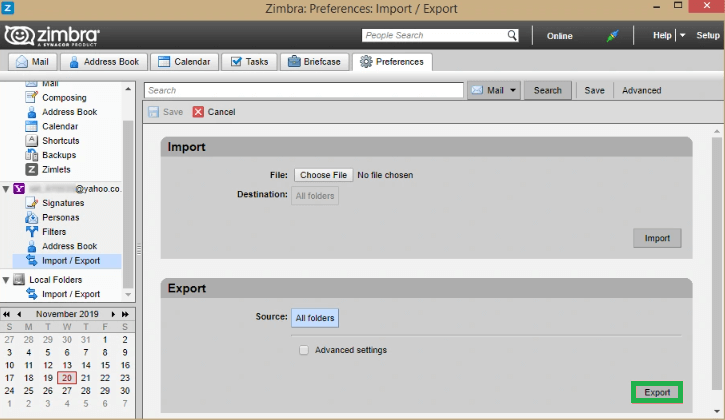
- Select the file destination where you want to save your exported EML file.
- Usually, the files will be exported in a zip file which can be extracted using WinZip or a similar tool.
- Now check the file extension of unzipped files as Zimbra only allows EML format for exporting.
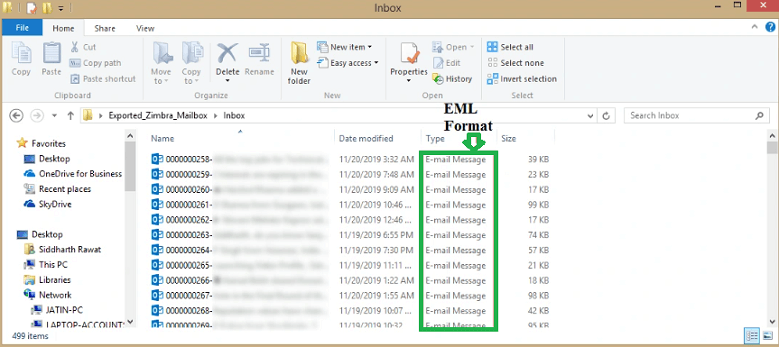
Migration of EML files to Outlook
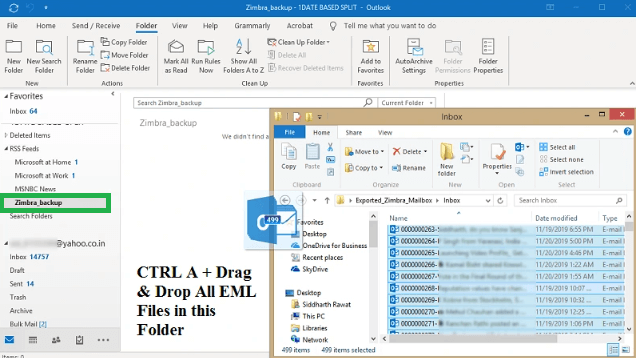
- Launch your Outlook desktop application and navigate the Folder tab from the top bar. Now navigate and click on the New Folder tab.

- Next, enter a new name for the folder.
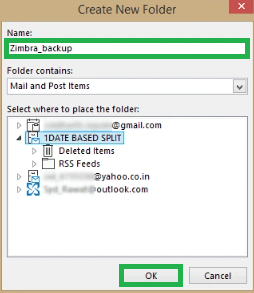
- You are now able to drag and drop all the EML format files into this folder.
Export Zimbra to Outlook PST files
- First, click on the File > Open & Export in the left pane.
- Choose the Import/Export tab for further procedure and in the appeared wizard select Export to a File.
- Select Outlook Data File (.pst) in this step.
- Choose the folder with all the Zimbra backup files.
- The Browse, button selects the location where you would want to save the file.
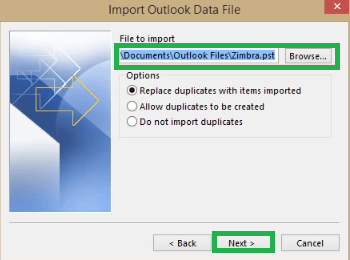
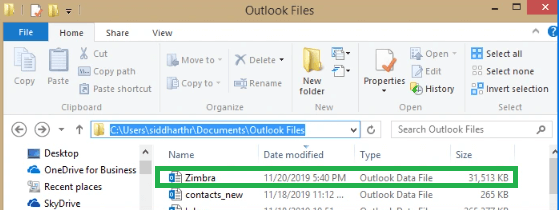
- To check if it is completed or not you can check the location of the PST file on your system.
Using third-party tools for exporting Zimbra to PST
The above-mentioned manual method is enough for any user to be able to achieve the desired task. However, the manual method is slow and has multiple steps that can confuse users and take time. For such users, we recommend that they use third-party IMAP converter or any other professional tool.
Conclusion
Zimbra is similar to Outlook in many ways and the performance is also very good which is why it is a good email client. To export Zimbra to Outlook PST files on your hard drive you need to follow the manual process with all the steps in sequence or you can also use a third-party tool that can ease out your job.

