Summary: Microsoft Outlook is one of the most trusted and useful mailbox used by clients. PST and the OST File formats are the two main important forms. many a times there may be a requirement to import OST to Gmail accounts this log will help to explore the same.
Importing the OST files supported by one email application to another on different domains is a tricky and slightly complicated task. However, it is still possible for you to you easily import OST to Gmail account. Offline Outlook Data File or OST file is offline storage used to store and synchronize various account types such as IMAP, Office 365, and Exchange Server information on your system. The best advantage of OST files is that you can work offline on Outlook These files will then get updated as soon as they get connected to an internet connection. These files are helpful for providing a temporary flexibility to the work.
Gmail only works with an internet connection and hence you need internet while importing files into the Gmail account. The OST files can be imported into Gmail in two ways; one being a three-step manual process using G Suite Migration for Microsoft Outlook or GSMMO tool and the other being a direct method where you can use a third-party tool.
How to Import OST to Gmail manually?
Since it is not possible to import OST files directly to Gmail since it won’t support there is a need of converting them into PST files that can be imported to the Gmail account. This method consists of three steps namely:
- Locating OST file on your system
- Export the OST file to PST file extension
- Import the PST file to Gmail using the GSMMO tool
So let’s begin with the steps in the above-mentioned sequence.
1st Step: Locating OST file on your system
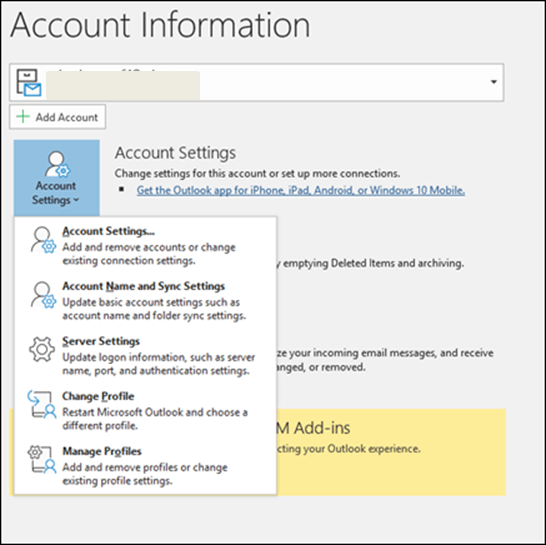
- Open your Outlook and click on File > Account Settings > Account Settings.
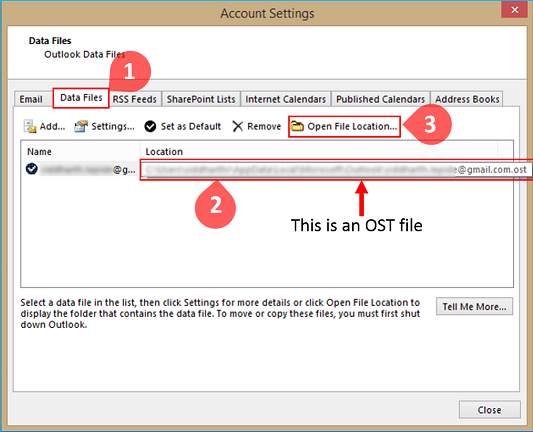
- In the dialogue box click on Data Files tab, choose OST file by its name and select Open File Location. This will take you to the location of all the OST files on system.
Note: Generally, OST files can be found here irrespective of the Outlook version-C:\Users\user\AppData\Local\Microsoft\Outlook
Note: It is to note that the AppData folder might be hidden; hence, the user has to unhide it first. To do so, in C:\Users\user, click on View tab > Options. Go to the View tab, expand Hidden files and folders, and select Show hidden files, folders, and drives.
2nd Step: Export the OST file to PST file extension
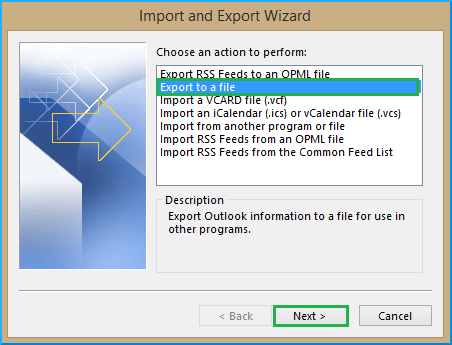
- Open your Outlook application, go to File tab > Open & Export > Import/Export. These steps will lead you to Import and Export Wizard.
- In the wizard select the Export to a File option before clicking Next to proceed.
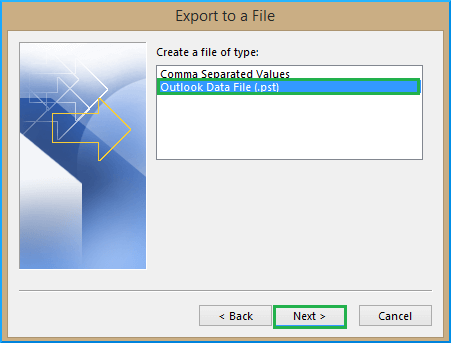
- Now in the Export to a File dialog box, select Outlook Data File (.pst) option and then click Next.
- In the next step click on the account that is required and select the file to export as a PST file afterward. Then Click Next.

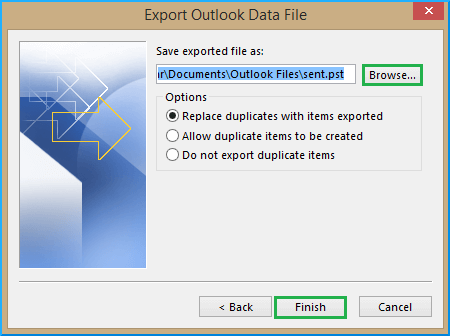
- Click on the Browse button to find a new location to save the PST file. The last step is to click on Finish.
3rd Step: Import PST file to Gmail using GSMMO tool
G Suite Migration for Microsoft Outlook or GSMMO tool is used to import data, calendars, and PST files to a Google Workspace. If you don’t already have it you can easily find it on the Google website in any manager through the internet.
- After downloading the application, launch it.
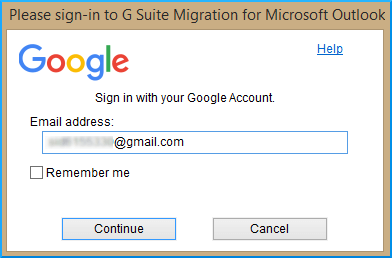
- Once you start with the installation you will be asked to provide Google account credentials. You can provide the credentials and click Continue to proceed.
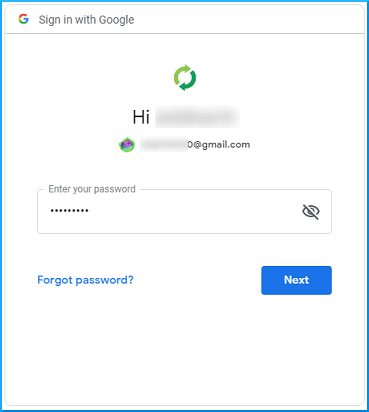
- You will be directed to the Google Sign-in page in your default browser. Enter your password to log in.
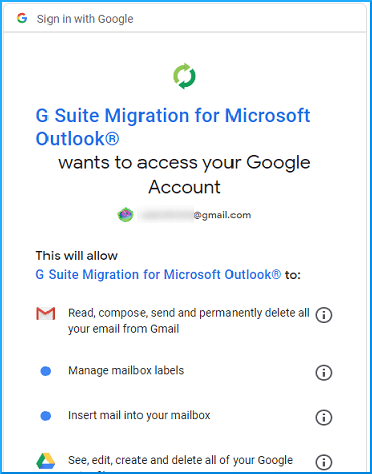
- In the next step, the GSMMO tool will ask for your permission to access your Google account. Click on the Allow button.
- You will see a confirmation message on the screen which means everything went well.
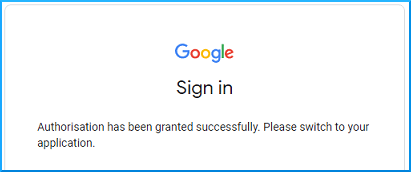
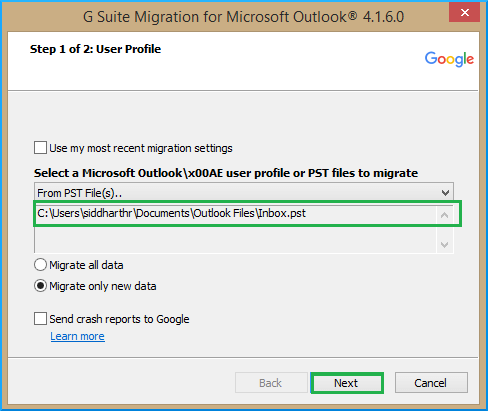
- After that GSMMO dialogue box will appear before you. In the drop-down menu select From the PST files) and click Next.

- The systems will take you to the default location where all the PST files are saved. If in case you have saved it to a different location you can browse to that location by putting it in the address bar.
- You will see that the file is imported. Click on the Next button.
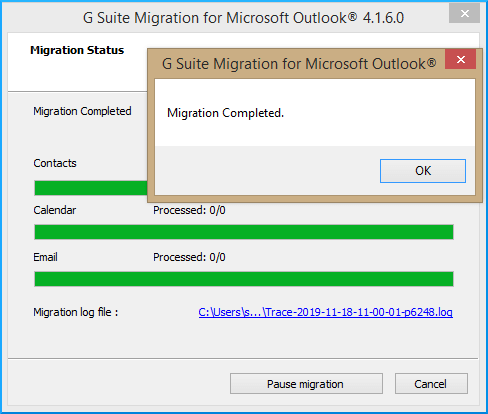
- Adjust the migration settings according to your preferences and then click on Migrate.

- After the completion of migration, you will see a message of successful migration on your screen.
- Login to your Gmail account and in the left pane check for any new imported PST files.

Importing using a third-party tool
You can use the third-party tool if you feel the above-mentioned process is too extensive or complicated. The OST to PST converter can be used in place of Step 1 in the above process and you can perform with the second part directly. There is another tool that can directly import OST to Gmail account. This is more hassle-free There are some other features you would get if you choose a third-party tool subject to the company.
Conclusion
Importing OST to Gmail is a little tricky but with professional help, it is achievable without affecting the credibility of the data. The steps in the manual method should be followed in a sequence to achieve the result while direct third-party Best OST to PST converter tools can be used for reducing the work and hassle-free experience. Any other method can be selected depending on the convenience of the users and the rate of the success which has been obtained.

One of my friends helped me search out this important blog as I was looking for a solution to import my OST file to my Gmail account. All the suggested steps helped me a lot to convert my OST to Gmail. I appreciate this blog, which is the best solution to manually convert OST to Gmail.
There is no tool for exporting data directly from OST files to the Gmail account. For that, there are two stages, which are straightforward. First export Outlook data to PST, then upload it to your Google account using GWMMO utlity.
With the help of this blog’s manual methods, I moved my OST file to my Gmail account. The blog provides a step-by-step procedure with pictures to help users transfer an OST file to their Gmail account. Thanks for sharing this informative blog.
This blog contains the method in step-by-step, pictorial form that helped me import OST files to my Gmail account. The blog has provided all instructions in a way that is easy to understand for every user. Thanks for this well-written blog.
I wanted to import my OST files to my Gmail account. Then I saw this blog, which provided me with good information in a better way. By following these steps, I easily imported my OST files to my Gmail account. Thanks for sharing this method.
Thanks for sharing such an important blog by which I transferred OST data into Gmail account. In every step it guide me very well and given tips make my way easier. The blog has various useful features and I got to know these features when I do this task.
I imported OST files to Gmail account with given manual solution. It explained all necessary details sequentially, helps me several times between the process. Thanks for sharing this useful method.
I managed to import OST file to Gmail with this method. It’s a useful blog, shared all steps in pictures. So its easier to me, understand and applying.