Archiving helps declutter the Outlook mailbox and space for new messages. The Auto Archive feature of Outlook helps in archiving these emails automatically which saves the time and effort of the user. The messages and data can be transferred from the mailbox to the archive folder very easily using the auto-archive feature. In most cases, the auto-archive feature is successful except in a few cases where users have found it missing or Outlook auto archive not working even with the correct set of settings. In this blog, we have discussed a few methods that can be used to solve this issue.
1st Method: Changing Settings if Outlook auto archive not working
There are multiple levels at which this setting can be checked and changed namely: Default, per folder, and manual settings.
Level 1: Auto archive Default Settings
- Go to the File menu on the application.

- In the left pane select the Options tab.
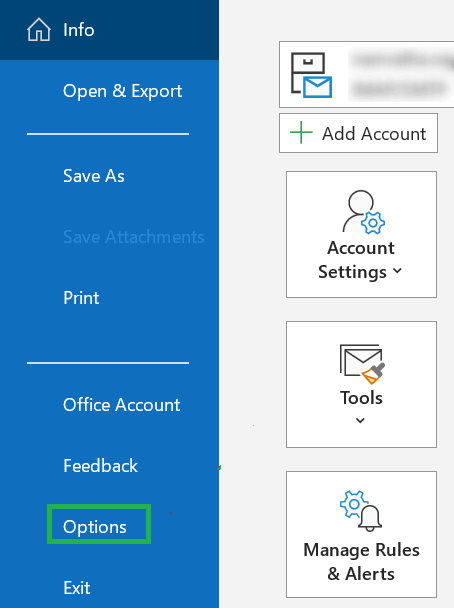
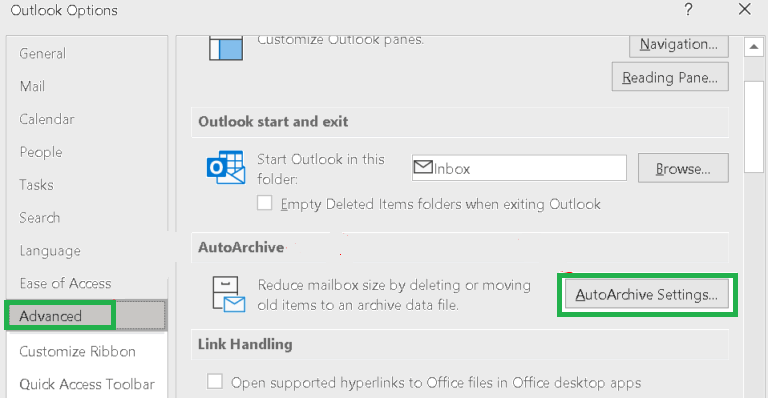
- In the appeared window select the Advanced option.
- Navigate Autoarchive in the right pane of the window and select the AutoArchive Settings… button to proceed further.
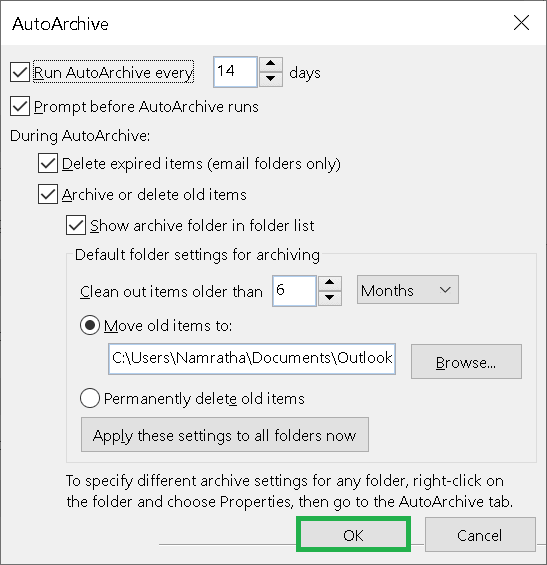
- Check the first box so that it is confirmed that autoarchive works. Now you can configure the auto-archiving duration according to yourself.
- To get a notification before autoarchive check the box against Prompt before AutoArchive runs.
- Also, check the following options:
- Delete expired items (e-mail folder only) to delete the expired items from the mailbox.
- Archive or delete old items to delete old items that have expired.
- Show archive folder in the folder list will allow you to find the archive PST file in the folder easily.
- You can also set the age for all the items in your e-mails which will allow archive in the field of Clean out items older than x that is simply based on the last modification done by the system.
- There is the option for you to choose between keeping old files in an archive file or deleting them permanently.
- Now click on OK to save the settings edited by you.
Level 2: Per folder settings
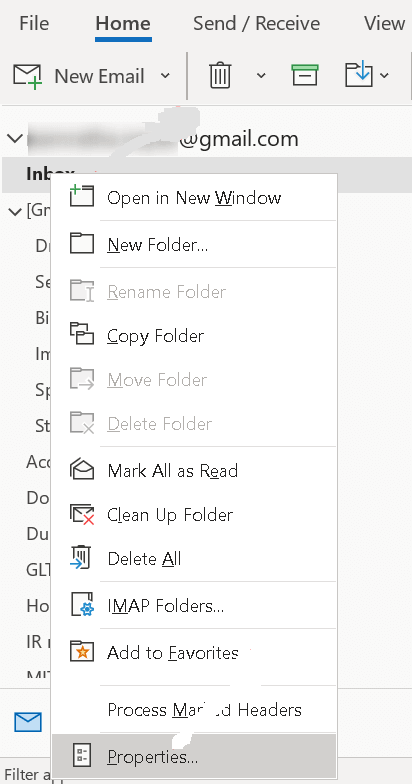
This helps in case ‘Outlook auto archive not working’ for a particular folder. Follow these steps in such case:
- Click on the folder and right-click on it then select Properties.
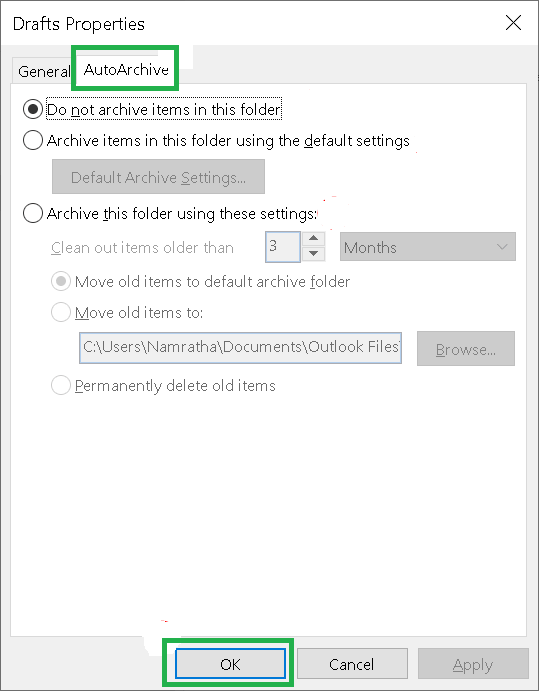
- Click on the AutoArchive tab button.
- From the below-mentioned settings, you can select according to your requirements:
- Select Do not Archive Items in this to make an exception.
- Select Archive items in this folder using default settings. This will allow you to archive the items as per your settings as discussed in the above steps of Level 1.
- Select Archive items in this folder using these settings if you want to change a few settings such as the age of the items to be archived or deleting old items or creating a separate archive file.
- Click OK to complete the settings of folders. This will not apply to sub-folders.
Level 3: Archive Manually while above methods not to fix Outlook auto archive not working Issue
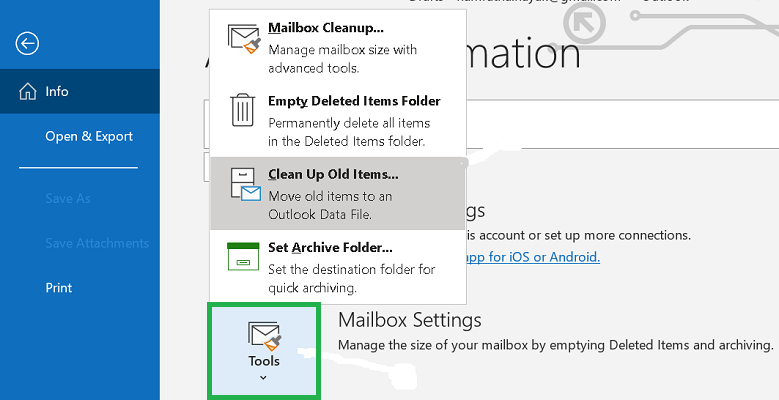
- Go to Files and select Tools from it.
- Select Clean up old items in Tools which will start the archiving process. It will be visible in the status bar.
2nd Method: Modification of ArchiveIgnoreLastModifiedTime registry value
This is a complication faced by many users. Modified date and time of the item is the basis of Archiving files or items in Outlook and when you reply, send, forward, move, edit, or import any item it will modify the time and date. These will autoarchive to miss the archiving of this item. There have been instances where users have found archiving to be done based on ArchiveIgnoreLastModifiesTime registry value. This can solve the issue but before going further you should make a copy of this file in case of any errors.
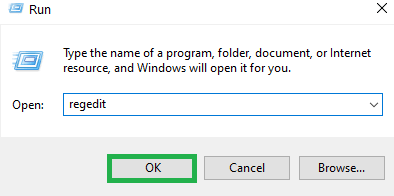
- Press Windows+R to launch the run window. To open the registry editor type Regedit.
- Go to the location by copying the location address mentioned below.
HKEY_CURRENT_USER\Software\Microsoft\Office.0\Outlook\Preferences
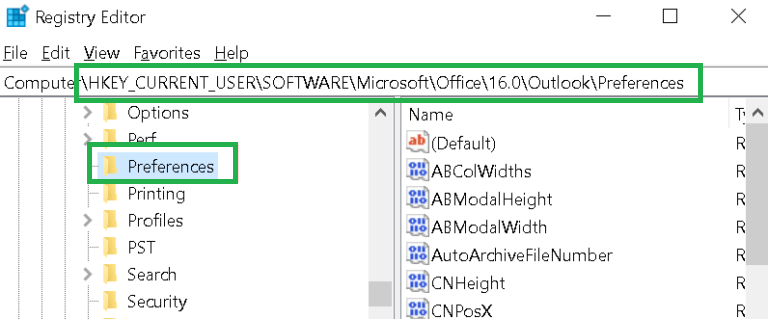
- Click on the Edit menu after reaching the above registry subkey.
- Now select New and then DWORD (32-bit) Value for creating a new item in the registry.
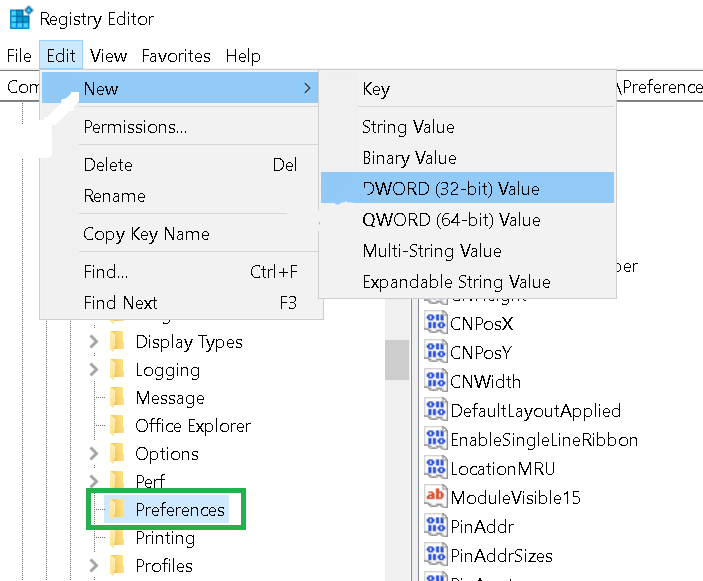
- Use ArchiveIgnoreLastModifiedTime as the name of the new item and press Enter.
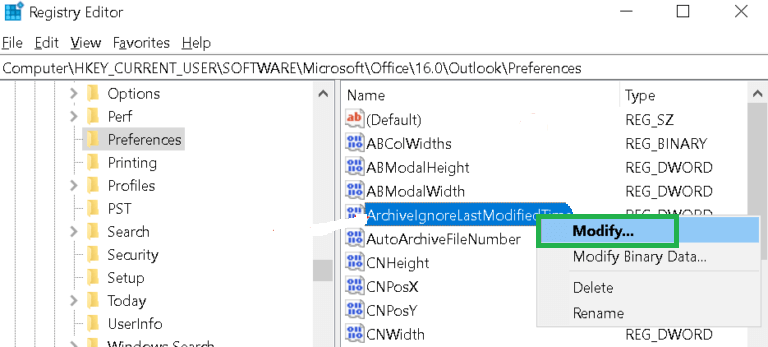
- By right-clicking on a new item you can select Modify as the next step.
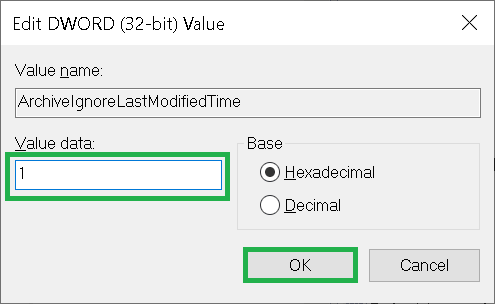
- In the Value Data box set the value to 1 and then click OK.
- Close the registry and check the changes by restarting the Outlook application.
3rd Method: Exclusion from AutoArchive feature
If there is a particular file or item that is not in the archive list then it must have been excluded from the autoarchive feature. To check and correct please follow the following steps:
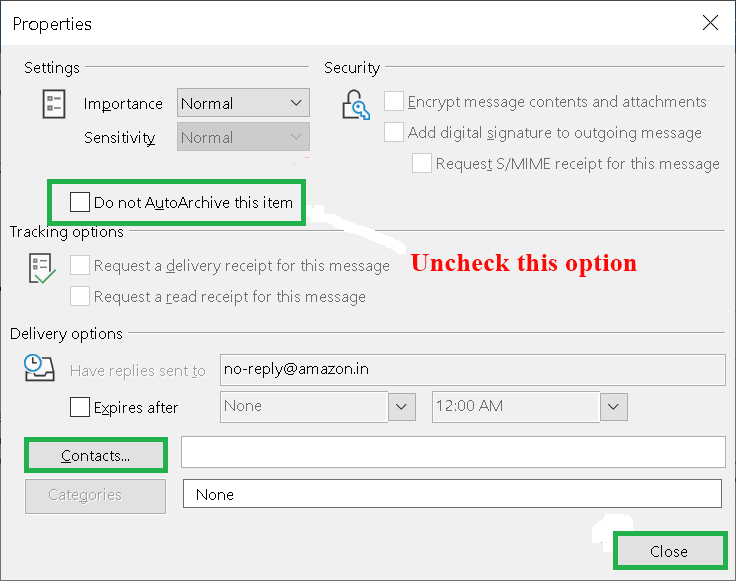
- Double click to open the item or file that has been excluded by the autoarchive feature.
- Click on the File menu to select Properties.
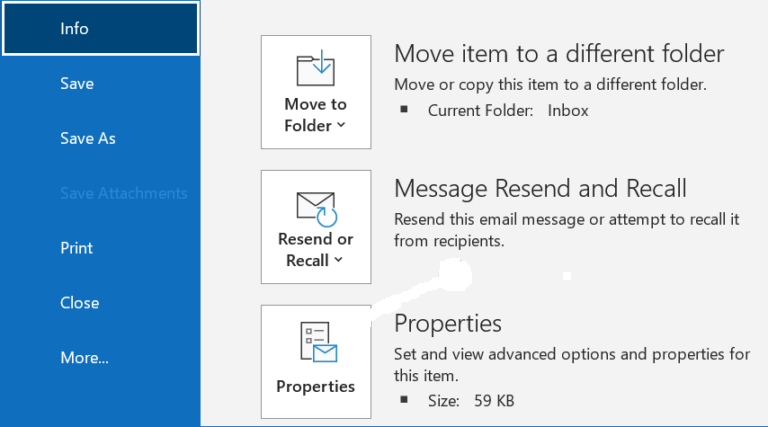
- Uncheck the option Do not AutoArchive this item in the Properties window.
- This option has been configured to get an overview of the items which can customize your view. For this you have to allow the in-cell editing function using the below steps:
- Go to View then select View Settings.

- In the appeared window click on the Other Settings tab.
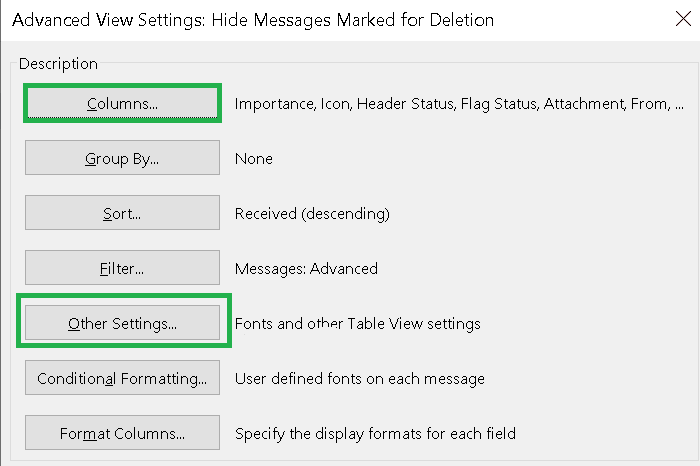
- Check the in-cell editing option.

- Now for a particular item, you can select the checkbox under Do not AutoArchive directly from View.
- Go to View then select View Settings.
4th Method: Availability of Archive command in Corporate setting
Autoarchive disabled due to Group’s policy: Due to some professional reasons such as preventing mailbox data from spreading to other computers in the corporation, many corporate offices do not allow the autoarchive feature in their Outlook application.
In such cases, administrators are the people to be contacted as they will be able to guide where you can archive your data. Or if there is any chance that the office has some way to archive and save data in other ways.
Online Archive as means of Archiving: One of the corporate reasons is having an Exchange account that disables the client archive feature and archives all the items in the online archive. This has its advantages since now you can access the archive files from any computer having an Outlook application or even on the web.
5th Method: Damaged or Full Archive.PST
With a damaged PST file of Archive, it will not allow any more archiving of any kind of file or item. In such cases you have close the Outlook and have it checked with Inbox Repair Tool (using Scanpst.exe). after that create a new archive file.
With Full Archive.pst it is obvious that there is no more space left in the archive file. This will force stop archiving in manual and autoarchive mode as well. Hence you have to create a new archive file.
The size of the archive file is dependent on the Microsoft Windows version.
6th Method: Empty or declutter your full mailbox
In the case of a full mailbox, you receive a warning message for normal messages, but that does not happen with the archive feature. Outlook will not show any message and stop archiving your files. To solve this issue either you delete unwanted messages from your mailbox and shift them to the archive folder or ask your administrator to increase the size of archive.pst temporarily.
To clean out the mailbox you should start from your least important folder to the most important. So you should start from- Deleted items, junk emails, inbox, sent items, journal, calendar, contacts, and then finally notes.
Wrapping it up
Autoarchive is very important and try above methods to fix Outlook auto archive not working issue and have a backup of your data without having to take back-up again and again. You can either set settings according to your requirements or do it manually depending upon the size and number of items you would want to archive.

