VHD or Virtual Hard Disk is a file format of disk image that is directly related to the virtual machine. The disk image, sometimes called a virtual machine contains data on the computer’s hard drive.(open VHD file to view the data) Virtual machines only work if they have been mounted to the system. It is not particularly difficult to mount VHD or remove it. Generally, after the work is done the VHD is removed from the system to create space for storage. The detaching of VHD also helps in protecting the data stored in it for that much time. Therefore it is important in some cases to remove the VHD from the Windows PC.
There is more than just one method to remove the VHD from a virtual machine. In this blog, the methods will be discussed and all the steps to perform the unmounting properly.
Methods to remove VHD from Virtual Machine
- Using Command Prompt
- Using Disk Management Console
- By shutting down the virtual machine
All the above-mentioned methods are manual and very easy to perform. Let’s see the step-by-step process for removing VHD.
1st Method: Using Command Prompt
This method works by performing CMD commands to detach or remove the VHD. Here are the steps to do so:
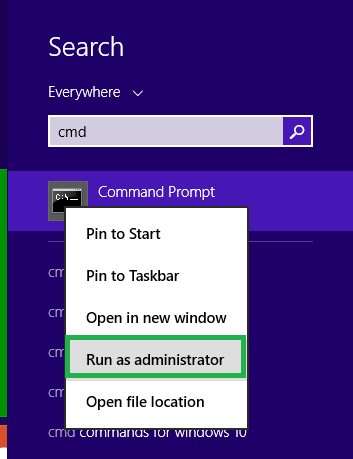
- In the Search box type cmd and it will show Command Prompt option. Right-click on the command prompt to select the option Run as Administrator.
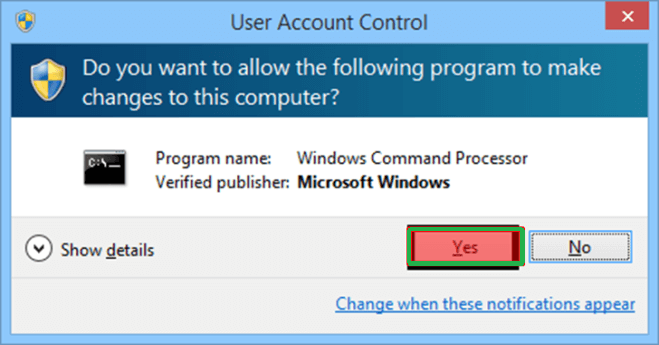
- In the next step, you will see the User account control wizard where you will have to click on the Yes option.
- Command prompt window will appear before you. Type and run the diskpart command to reach the partition mode of the disk.

- Now to select the VHD file from your system run the command- select vdisk file= “<enter VHD file path location>”.

- You can now use the command mentioned to detach VHD- detach vdisk.

- In the last step to perform use the Exit command in the prompt to complete the process of detaching VHD.

- You can now see that there is no VHD in the disk partition of the system.
2nd Method: Using Disk Management Console
This is another method to remove the VHD from the virtual machine. The disk management console is simple and easy to execute to perform this task. Here is the step-by-step guide.
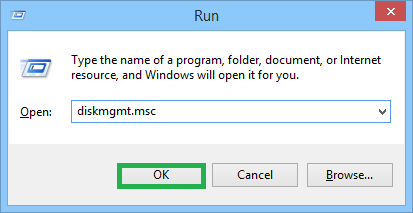
- In the search button type Run or Windows+R to open the Run window and type diskmgmt.msc before clicking OK to open the Computer Management page.
- Navigate and go to Storage to select the Disk Management option. You will now be able to see VHD and other disk drives.
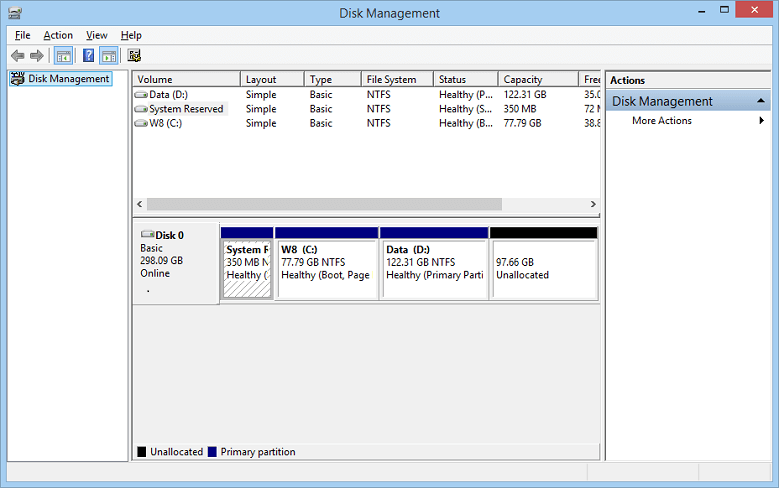
- Now select the VHD you want to delete and right-click on it. Click on the Delete button to delete the VHD.
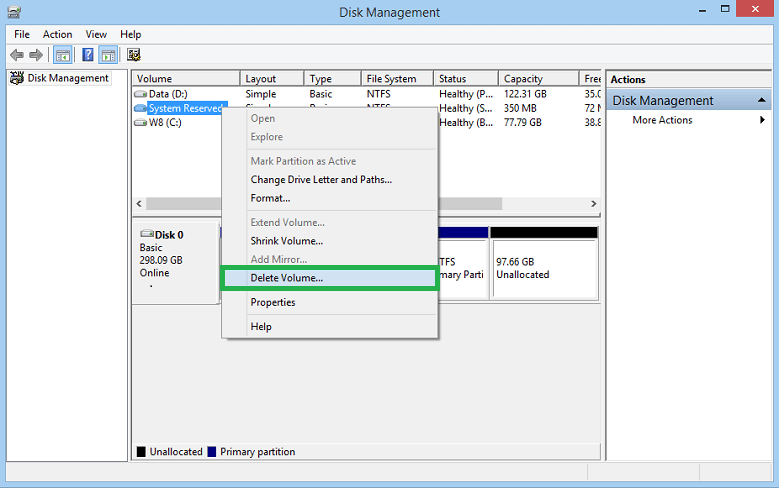
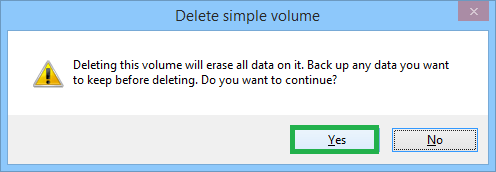
- A Delete Simple Volume box will appear. Click on Yes to proceed further.
- VHD is now unallocated from Online status. Select the VHD and right-click on it to select Detach VHD to completely detach it from the disk management system.
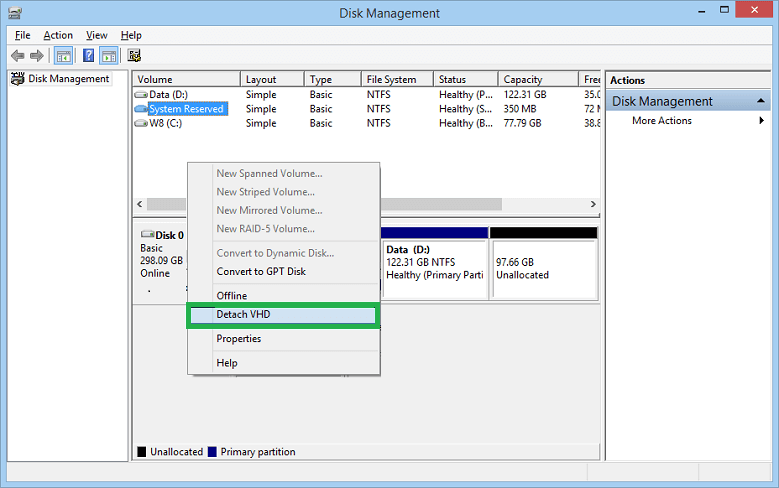
- The VHD is now removed from the system.
3rd Method: By shutting down the virtual machine
For this method, there need to be some pre-requisites so that the VHD can be removed. You need to shut down the virtual machine since you need to change settings which are not possible while the virtual machine is online or suspended. After the virtual machine is turned off follow these steps:
- From Window select Virtual Machine Library.
- In the library select the virtual machine and click on Settings for further procedures.
- In the Settings option click on the VHD to be removed and then click on the Advanced button for more options.
- Click on the Remove button in the advanced window.
After removing the VHD you can either keep the file in the virtual machine package or you can move the VHD permanently to the trash by deleting it. If you are looking for solution to recover deleted VHD files from corrupted and damages VHD files then you can use VHD recovery tool which is capable to provide complete solution.
Summary
VHD stores the data similar to the physical hard drive but needs to be removed to create storage space after the work is done. There are some manual methods mentioned above that can be used to achieve the task properly.

